One of the most significant skills in every laboratory titration is accurate reading of a burette.
Chemical analysis can also give wrong results in the event of a slight mistake in reading the burette.
Here, you will get to know how to read a burette properly, the level of the meniscus and how to avoid parallax error along with examples and tips.
The first step in using burettes is to learn what a burette is and what are the uses of a burette, so first familiarize yourself with our comprehensive guide to burette and burette uses.

What to Have before Reading a Burette.
Prior to having any reading, you need to have:
- A dry and clean (preferably 50 mL) burette.
- Eye level position during observation.
- Clear lighting in order to have a good view of the meniscus.
1. The first step is to fill the Burette Properly.
Add a solution to your burette with a funnel. Make sure that no air bubbles on the tip or on the stopcock.
👉 If you’re unsure, see our guide on How to Fill a Burette Properly.
Step 2: Systematize the Liquid to the Zero Mark.
Close the halt and take a little of the liquid off at a time until the lower meniscus (the curved side of the liquid) reaches the zero mark.
Step 3: Read at Eye Level
- Keep your head straight such that the eyes are even with the meniscus.
- Looking either up the sides or down, it produces parallax error, the most frequent error of reading in titration.
Step 4: Take Research Reading.
Step 5: Conduct the Titration
Titration of the solution may be performed by allowing the solution to drop-wise into the conical flask.
Stop once the indicator (e.g. phenolphthalein) changes color.
Step 6: Take the Final Reading
Check the burette once more at eye level.
The difference between the final and the initial reading gives the quantity of the liquid used.
Example of Burette Reading
- Reading Type Meniscus Position (mL)
- Initial Reading 0.00 mL
- Final Reading 24.60 mL
- Volume Used 24.60 mL
- Findings: 24.60 mL of solution was used to titrate.
- Knowledge of the Meniscus in the Burette Reading.
The upper surface of the liquid in the burette is curved and is known as meniscus.
Most lab solutions (acids, bases, etc.) have the meniscus curve downwards – this is referred to as a concave meniscus.
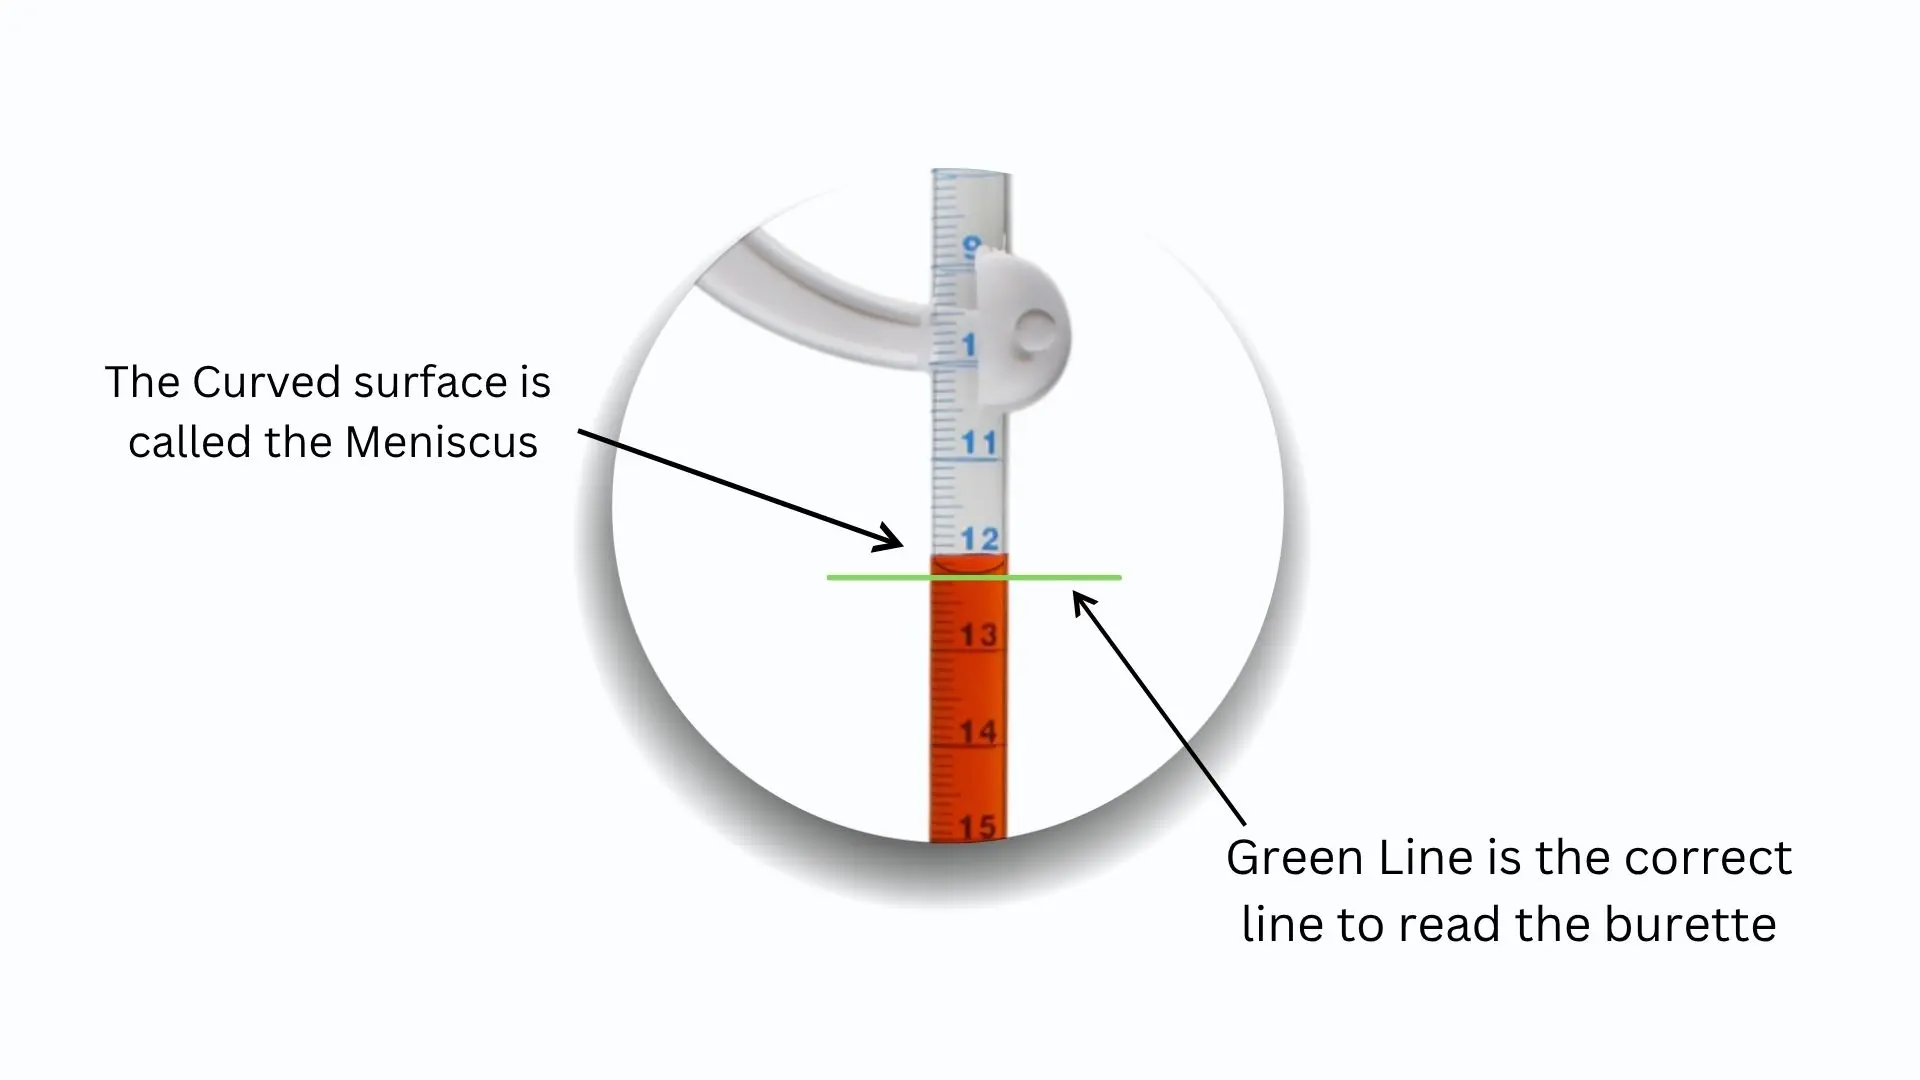
One should read the base of the meniscus not the top.
This guarantees the use of the same and correct readings consistently.
Mistakes to avoid during Burette reading
- Reading above the meniscus or below the meniscus – leads to parallax error.
- Contaminated walls of the burette – liquid adheses and the shape of the meniscus alters.
- Failing to eliminate the air bubbles – inappropriate zero point.
- Weak vibration or stand – oscillating values.
- Eye-level lighting is wrong – blurred line of meniscus.
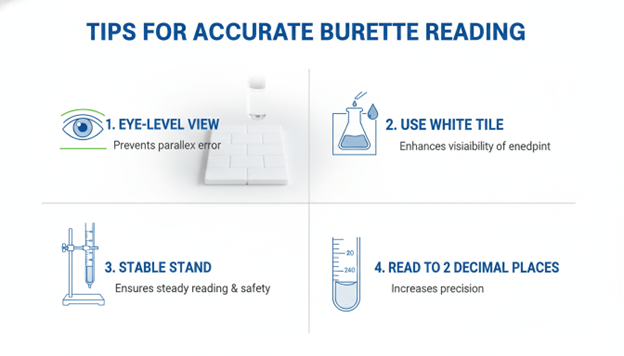
Essentials of burette reading
- Better contrast is achieved with the use of a white tile or sheet behind the burette.
- Record the readings to the closest two decimal places ( e.g. 24.60 mL).
- Wipe the burette with the same solution and then titrate.
- Read and reread the same answers and get an average.
Conclusion
- The precision is the answer to obtaining accurate titration results, and it may seem that reading a burette accurately is easy.
- You should always make sure that your eyes are at the same level with the meniscus and note down some readings.
- Practice will help you eradicate parallax errors and you will be sure about volumetric analysis.